
Next Lesson: 9.2 Retouch4me Basic Setup
Apps from This Lesson
Retouch4me Plugins
Get 20% OFF All Retouch4me Plugins
Download my Photoshop action
Worth Following
Danny Postma
Founder of HeadshotPro.com. Danny shares extremely useful hints for AI solo-entrepreneurs.
9.1 Retouch4Me Workflow
Ok, we have learned how to speed up image culling and editing using AI-powered tools and auto adjustments. Now, it’s time to set up your AI retouch system. In this video, we’ll overview Retouch4me plugins, and I’ll show you how to implement them into your workflow.
Let’s start with the overview; here is the Retouch4me website, where you can find all the available AI plugins.
At first glance, this variety of plugins looks a bit confusing and even scary, considering the prices. However, we can easily sort them into two groups to simplify the choice.
Let’s call the first group Basic Setup.
It contains three mush-have plugins that are required for proper AI retouching:
- Heal
- Dodge & Burn
- And Mattifier
Using these plugins, you can fix most skin issues, such as pimples, skin bumpiness, and shiny skin. In my company, these plugins are an essential part of our retouching process. Sometimes we use other plugins as well, but we never skip Heal, Dodge & Burn, and Mattifier.
Still, some images require additional retouching, which can be achieved by plugins from the second group – Extended Setup. It includes plugins that are not mandatory to have in your workflow, but they are extremely helpful for particular types of images.
For instance, when we need to even out skin tone on portraits, we use the Skin Tone plugin.
- The White Teeth plugin works great for batch teeth whitening.
- When we shoot in a studio, we use Clean Backdrop to fix studio background issues.
- Portrait Volumes is a great tool to enhance headshots quickly.
- And plugins from the Eye Bundle work excellently with close-up portraits.
In the next tutorials, I’ll show you how to set up all these plugins and what are the best practices for AI retouching.
Now, let’s see how to implement Retouch4me plugins into your workflow.
When you need to retouch a single image, you have a pretty simple choice. If you have a Photoshop license, you can install the Retouch4me panel and run all processing in a single click. Alternatively, you can send an image from your RAW converter to Retouch4me stand-alone apps.
BTW, if you use Capture One, it makes sense to assign custom shortcuts for every Retouch4me plugin you use.
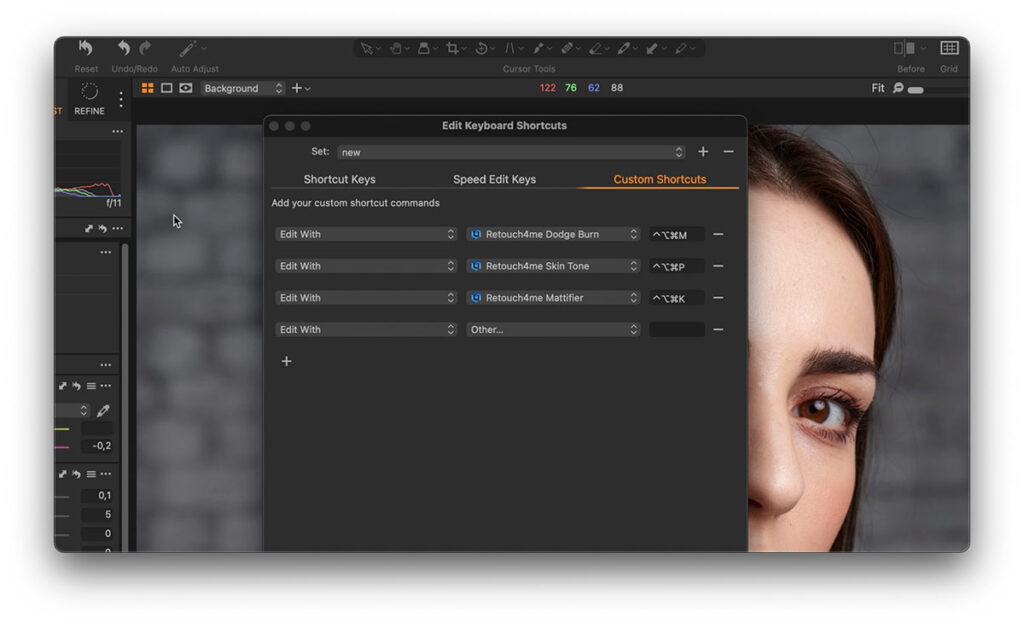
Note that this feature is available starting from Capture One 23 16.2 only.
In any case, single-image editing is not a problem. The real question is how to build a solid batch retouching workflow.
Basically, there are three ways for this.
- Batch editing workflow
- Using stand-alone apps
- Running Photoshop actions
First of all, Retouch4Me plugins, as stand-alone apps, support batch editing.
Simply select a group of images and open them in an app.
Then you can set the adjustments and process all the images.
If you wish to see how these adjustments will impact your images, you can click on any photo and set the values that fit your shoot best.
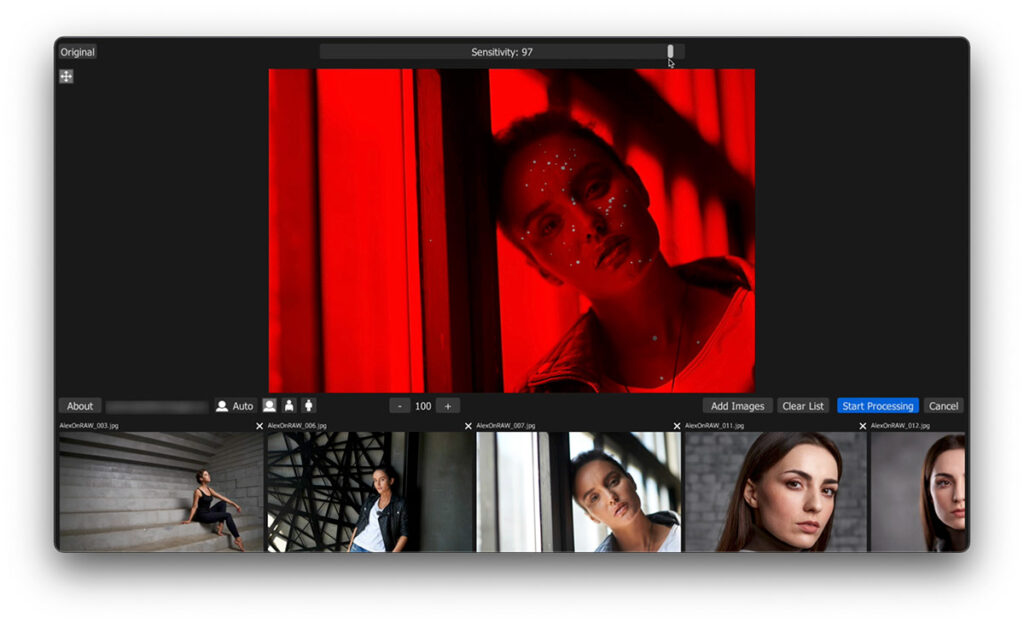
The problem with this approach is that you need to run processing with every plugin manually. However, it gives you full control over every retouching step. For instance, after applying the Heal plugin, you might notice that it has removed some moles. In this case, you can re-run these images and preserve the moles before proceeding to other retouch plugins.
Still, if you want to have a fully automated retouch system, you can easily build it with Photoshop actions.
A Photoshop action is a recorded sequence of image editing steps that you can run in a single click. Thus, you can record image processing with any Retouch4me plugins and run such action on a batch of images.
For instance, let’s create an action to automate all the Basic Setup plugins: Heal, Dodge & Burn, and Mattifier.
First, open an image in Photoshop and start recording an action:
Then, run the Heal plugin in Photoshop. It comes with the Heal app and will automatically appear in the Filters menu.
In the plugin window, set retouching impact and click Apply. The retouching will be recorded in your action:
Next, run the Dodge&Burn plugin the same way:
So, we cleaned all the pimples and made the skin look smoother. Now, it’s time to apply the Mattifier plugin to decrease skin shine.
Finally, save your image, and close it. Stop the recording. Your action should look like this:
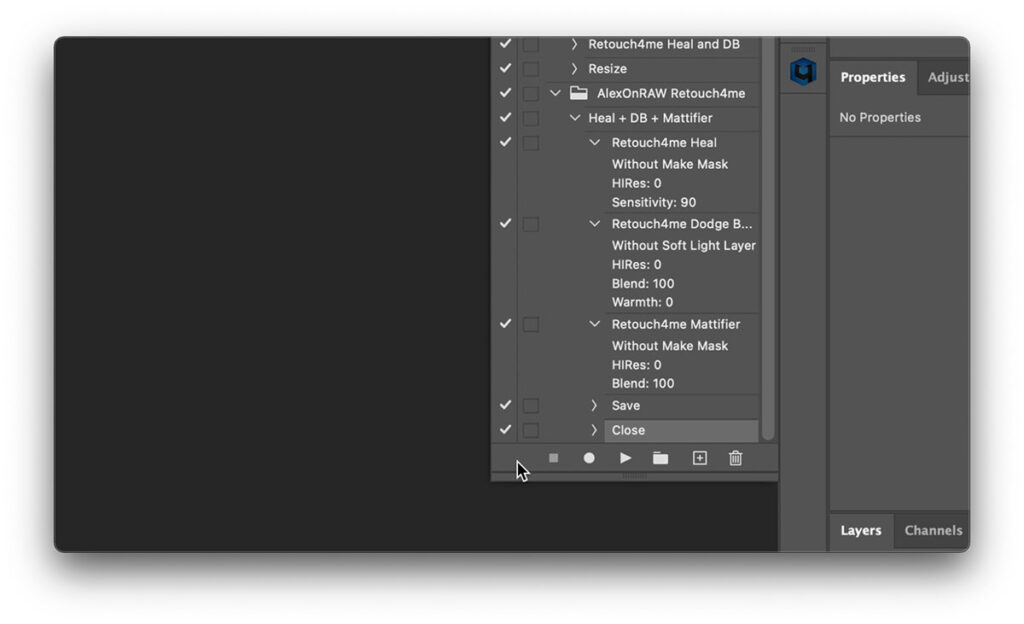
If you’re not familiar with Photoshop actions, feel free to download my action. Load it into the Actions tool, and your one-click workflow is ready!
To batch edit a group of images with this action, simply go to File -> Automate -> Batch
Here you need to select an action to apply and choose a folder with source images. Next, set a destination folder and run the processing.
The best practice is to record several versions of such an action with various retouch settings.
However, including all the retouch plugins in a single action is not quite safe. As I have shown before, the Heal plugin might remove moles, so splitting it from a Photoshop action makes sense.
In my company, we run the Heal plugin separately before further retouching. If the Heal output looks good, running all the other plugins together is pretty safe.
So, we have learned how to implement Retouch4me plugins into your workflow. Now, it’s time to figure out what settings are best to apply for optimal AI retouching. Let’s start with the Basic plugins: Heal, Dodge & Burn, and Mattifier.