
Next Lesson: 9.3 Retouch4me Extended Setup
Apps from This Lesson
Retouch4me Plugins
Get 20% OFF All Retouch4me Plugins
Download my Photoshop action
9.2 Retouch4Me Basic Setup
As we discussed in the previous lesson, The Basic Retouch4me Setup includes Heal, Doge & Burn, and Mattifier plugins.
Let’s start with the Heal plugin since it’s one of the most powerful AI tools for skin retouch. The Heal plugin cleans the skin from minor defects such as pimples, blemishes, and post-acne marks.
Usually, it makes sense to run the healing first and then process images with Dodge & Burn and Mattifier.
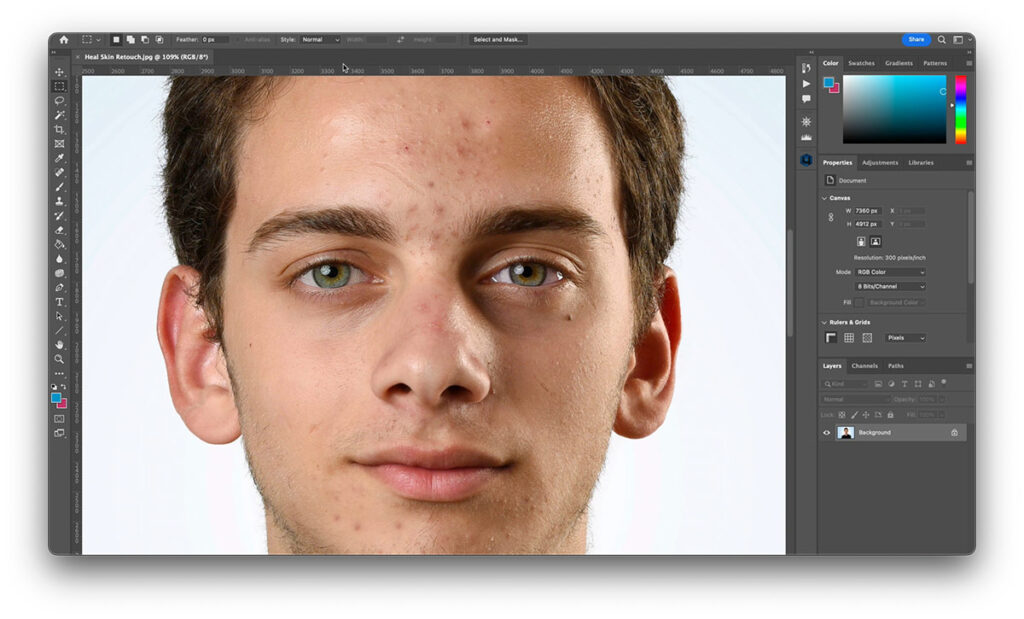
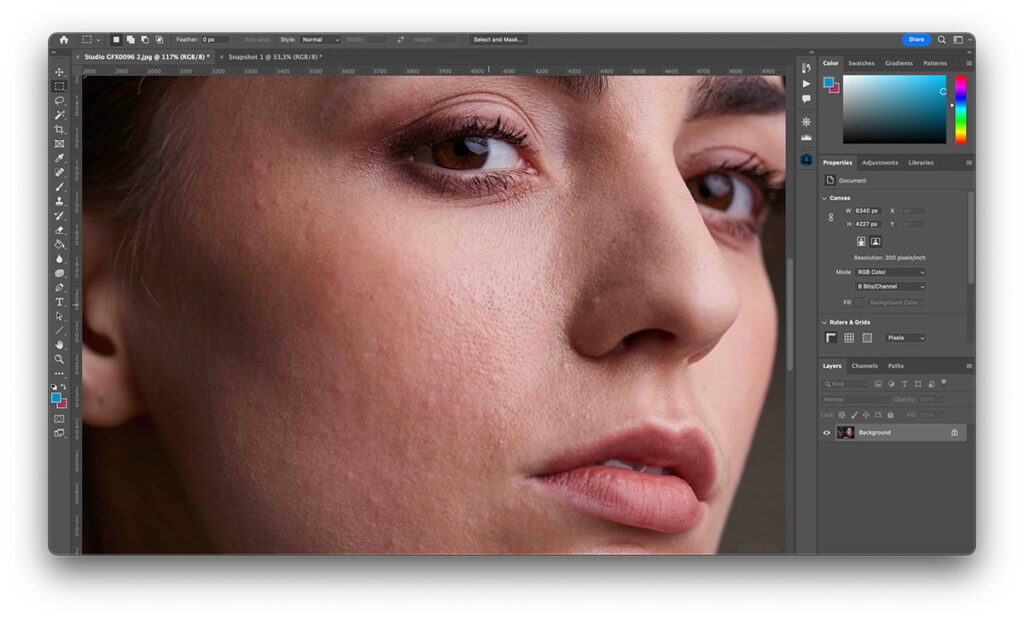
Here is how the Heal plugin works in practice. Let’s take this portrait with extremely problematic skin and run the Heal plugin.
It works pretty fast, and you’ll quickly see the preview of the retouched image.
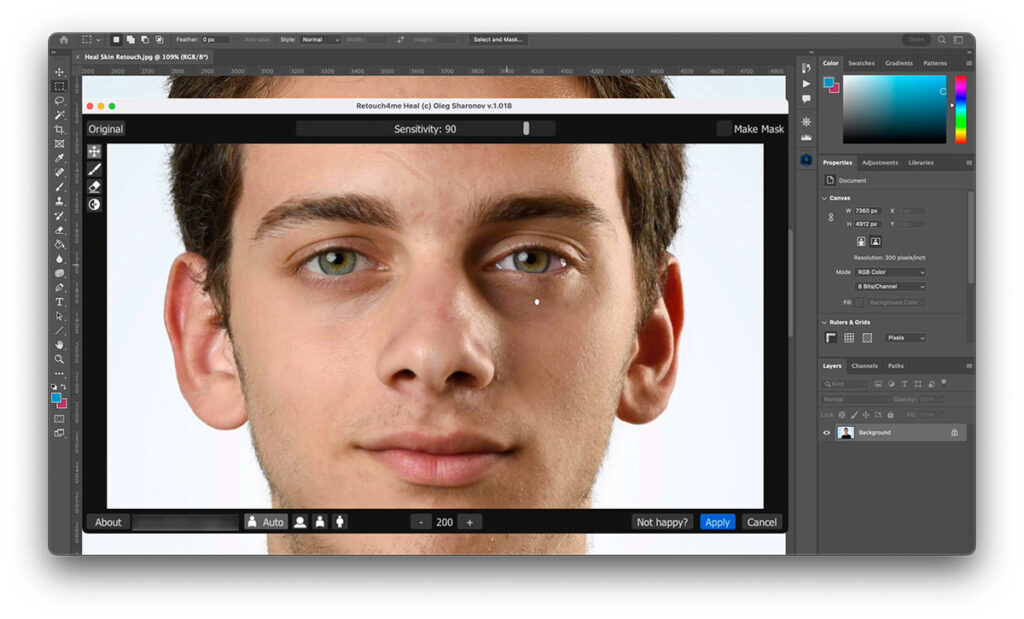
The Heal plugin has only one setting – Sensitivity, that determines how many skin details will be retouched. Usually, I use Sensitivity from 60 to 100, depending on how severe the skin problems are.
The most critical thing is that you need to keep an eye on moles. The Heal plugin tends to retouch the moles, and if you need to preserve them, you need to either lower the Sensitivity or remove moles from the retouching mask. Also, I recommend you pay attention to cloth patterns if they contain dots. The Heal plugin can also affect such areas. Unfortunately, you can’t batch-edit such images since they require manual mask corrections. Still, I hope Retouch4me developers will enhance their AI engine to deal with moles better. Other Retouch4me plugins are pretty safe for batch processing.
In every mode, the Retouch4me engine works differently, and the best practice is to let the app decide on the proper mode automatically, especially when you retouch a batch of various portraits.
Apart from Sensitivity, all Retouch4me plugins have three modes for different human scales on your image:
- Close-up portrait
- Half-length portrait
- and Full-lenght portait
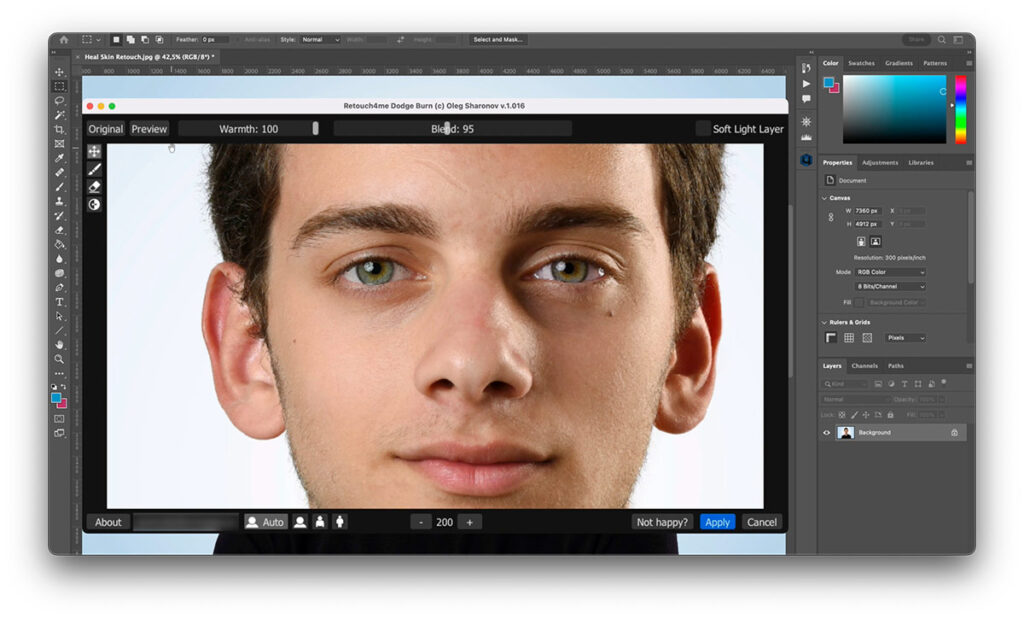
Ok, the Heal plugin has cleaned the skin, but it still has a lot of problematic areas that we can fix with the Doge & Burn plugin.
The Dodge & Burn plugin is designed to smooth skin bumpiness and make bags under the eyes and veiny hands less noticeable.
It works slower than the Heal plugin, but the processing speed can significantly vary depending on your hardware. The Dodge & Burn plugin has two settings:
The Warmth setting makes cool areas of the skin a bit warmer. It’s hard to recommend some particular values since it highly depends on your image, and in many cases, you can easily leave it at zero.
The Blend slider adjusts the Dodge & Burn impact. Usually, we use these values:
- For kids’ portraits, if they require Dodge & Burn, the optimal values are from 30 to 50.
- For female portraits, we use values from 40 to 70.
- And for male portraits, we usually apply values from 60 to 90.
- In some severe cases, like this one, you can go beyond 100, but it might harm the skin structure.
BTW, by holding down the Preview button, you can see the areas that will be affected by the plugin. And the same way as with the Heal plugin, you can erase parts of the mask.
The Dodge & Burn plugin is pretty safe for batch editing, although it can occasionally affect some particular types of clothing. But in most cases, it’s reliable for group processing.
The Heal and Dodge & Burn plugins have done a nice retouching here. The skin tone is a bit uneven in some places, and you can quickly fix it with the Skin Tone plugin. But we’ll discuss it in detail in the next lesson since the Skin Tone plugin is not mandatory for AI retouching.
Finally, we can apply the Mattifier plugin here to lower the skin shine.
Mattifier is one of the most accurate and reliable Retouch4me plugins.
It’s pretty effective, even at 20 or 30, and we usually don’t go higher than 70 or 80.
So, let’s compare the original image and the auto-retouched.
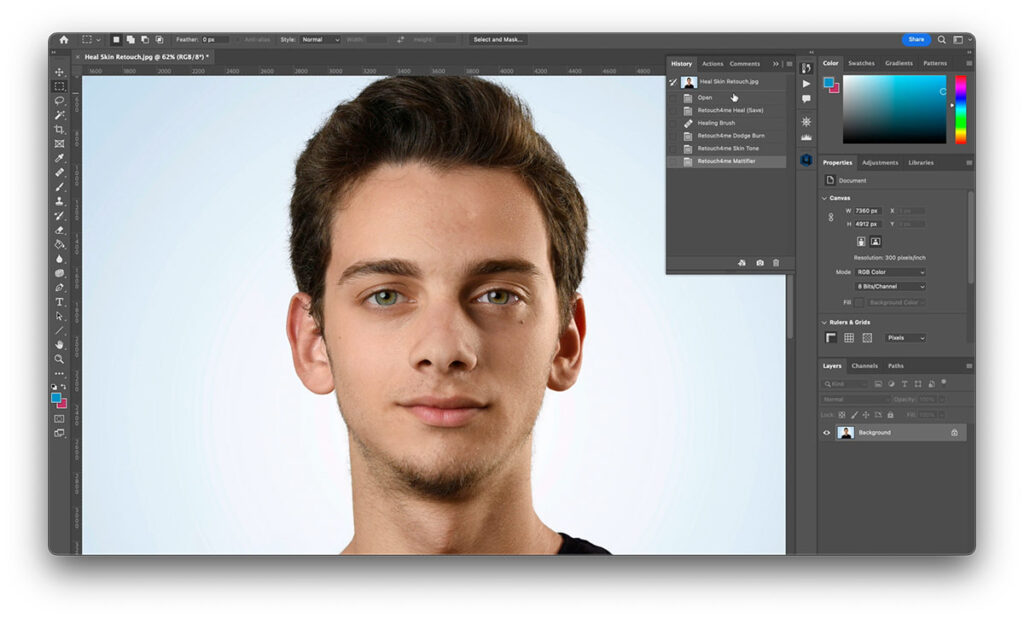
I think that’s a pretty solid result for such severe skin issues. If you are a fashion or commercial photographer, I bet you want to apply some additional manual corrections. But for regular business or family photography, that’s a solid result that can be easily applied to a batch of images.
Note that Heal and Doge & Burn don’t affect scars and other permanent skin features. I think it’s very important since I believe that retouching should remove only temporary issues like pimples.
Ok, let’s see how these plugins work on more typical portraits.
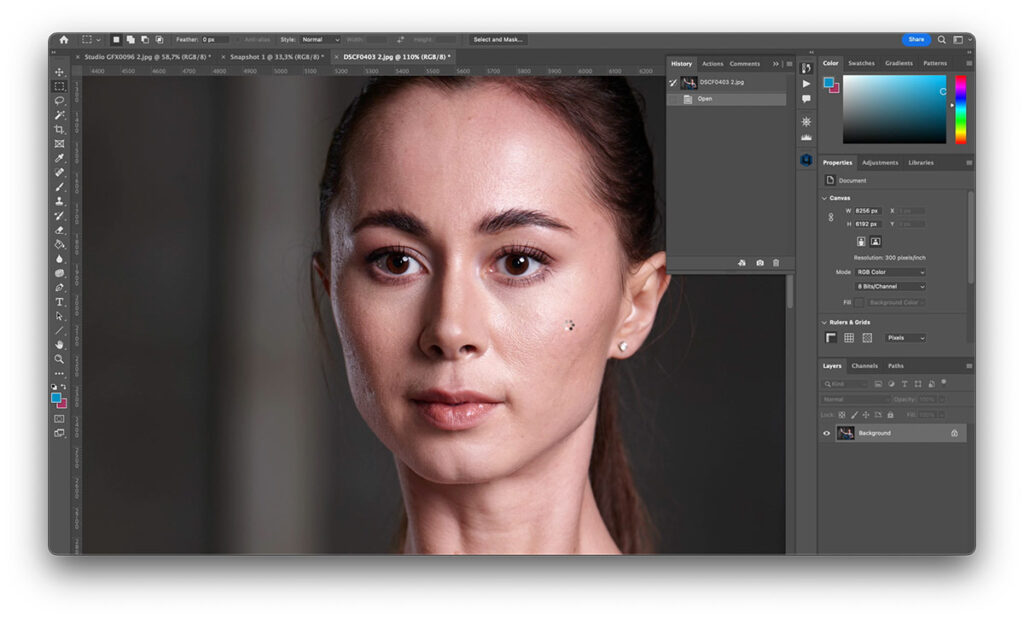
Let’s take this portrait with noticeable skin bumpiness:
First, I’m going to run the Heal plugin to clean the skin.
Next, I’m applying the Doge & Burn plugin with the Blend setting around 80.
This image is a typical case for the Mattifier plugin, and I just love how accurately it works.
I’ve tested almost all available tools for removing skin shine, but none of them are even close to Mattifier in the sense of quality.
The Heal plugin is just irreplaceable when you need to clean the skin of small pimples and bumps. The manual retouching of such images is highly time-consuming and boring.
In my company, we solve most of the retouching needs using these three plugins only. Still, sometimes our task requires additional tools. Let’s see why you might need other Retouch4me plugins and how to use them.